Cart
0
A friendly guide to building confidence, one stitch at a time
Learning to crochet is exciting — but with so many stitches out there, it’s hard to know where to begin. The good news is that you only need a handful of simple stitches to start making beautiful projects. Whether you’re dreaming of cozy scarves, dishcloths, granny squares, or amigurumi, these beginner‑friendly stitches will help you build a strong foundation.
Let’s walk through the easiest crochet stitches every beginner should learn — and why they matter.
1. The Slip Knot
Every crochet project starts with a slip knot. It’s the very first loop that attaches your yarn to the hook.
Why beginners love it:
-
Quick to learn
-
Adjustable
-
Sets you up for your foundation chain
Once you master the slip knot, you’re ready for your first real stitch.

1. Measure a short tail
Leave a tail of yarn about 4–6 inches long. This is the loose end; the yarn connected to the ball is your “working yarn.”
2. Make a loop
Hold the yarn so the tail is on the left and the working yarn is on the right.
Cross the working yarn over the tail to form a loop (like making a ribbon awareness loop).
3. Pinch the crossed point
Pinch the place where the yarn crosses with your thumb and index finger to hold the loop in place. This keeps the loop from twisting as you work.
4. Reach through the loop
With your other hand, use your fingers (or the crochet hook) to reach through the center of the loop from front to back.
5. Grab the working yarn
Hook or pinch the working yarn (the strand going to the ball), not the tail. Pull a small bit of that working yarn back through the loop to form a new loop.
6. Form the slip knot
While holding the new loop you just pulled through, gently pull on both the tail and the working yarn ends. The first loop will slide and tighten around the new loop, forming a knot that can move up and down.
7. Tighten onto the hook
Place the new loop on your crochet hook (if it’s not already there).
Pull the working yarn gently to snug the loop around the hook. It should be secure but still loose enough that the hook can move easily.
8. Check your slip knot
Tug the working yarn: the loop on the hook should tighten.
Tug the tail: the loop should loosen slightly.
If that’s happening, you’ve made a correct slip knot.
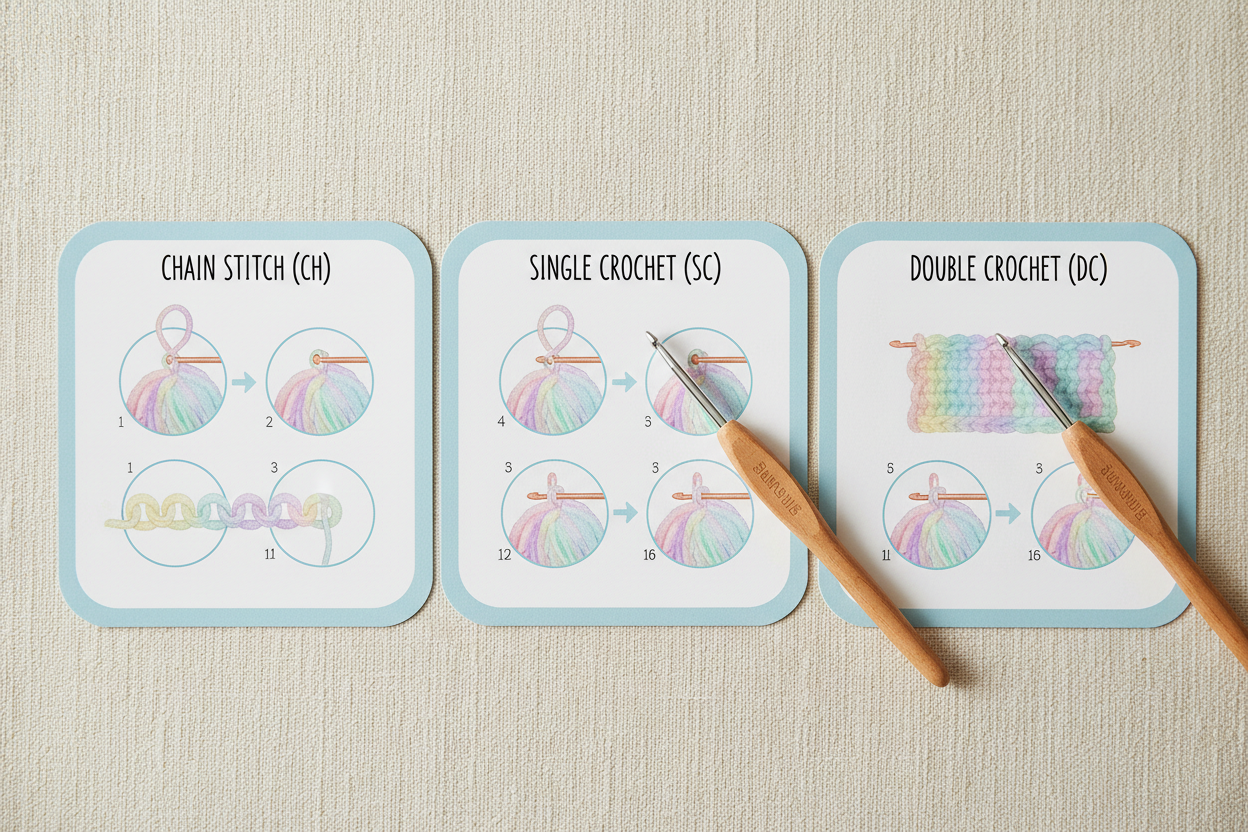
2. The Chain Stitch (ch)
The chain stitch is the backbone of crochet. It creates the foundation row for most patterns.
What it’s good for:
-
Starting any project
-
Making simple bracelets, ties, and borders
-
Practicing tension
Beginner tip: Keep your chains loose — tight chains make the first row harder to work into.

Before you start:
You should already have a slip knot on your hook and be holding your yarn comfortably.
1. Hold the hook and yarn
• Right hand: Hold the hook like a pencil or knife, whichever feels natural.
• Left hand: Hold the slip knot and tail with thumb and finger, and tension the working yarn (from the ball) over your fingers.
2. Position the yarn for a yarn over
• Let the working yarn come over your left index finger.
• The yarn should be behind the hook, ready to be wrapped over it.
3. Yarn over (YO)
• Move the hook under the yarn and then over, so the yarn rests in the hook’s groove.
• The yarn is now wrapped from back to front over the hook.
4. Pull through the loop
• Gently turn the hook so it faces down slightly (to catch the yarn).
• Pull the yarn through the loop that’s already on your hook.
• You now have one new loop on your hook and have made one chain stitch.
5. Repeat for more chains
• Keep holding the chain near the hook with your left thumb and finger.
• Repeat: yarn over → pull through the loop on the hook.
• Each time you do this, you add one chain stitch.
6. Check your tension
• The chain should look like a little braid.
• If it’s too tight, loosen your tension on the yarn.
• If it’s too loose, hold the yarn a bit firmer.
7. Count your chains
• Lay the chain flat and look at the “V” shapes.
• Each “V” is one chain stitch.
• Don’t count the loop on the hook.
3. The Single Crochet (sc)
This is the first “real” stitch most beginners learn. It’s dense, sturdy, and perfect for building confidence.
Why it’s great:
-
Easy to see your stitches
-
Creates a tight, even fabric
-
Ideal for dishcloths, coasters, and amigurumi
If you only learned one stitch beyond the chain, single crochet would take you far.

Before you start
You should already have:
• A slip knot on your hook
• A foundation chain of however many stitches your pattern says
For this example, we’ll pretend you chained 11 and will work 10 single crochets across.
Row 1: Working single crochet into the chain
1. Find the second chain from the hook
• Don’t count the loop on your hook.
• Look at the “V” shapes of the chain.
• The first “V” from the hook is chain 1, the next “V” is chain 2.
• You will insert your hook into chain 2 from the hook.
2. Insert the hook into the chain
• Put the hook through the center of that second chain, under the top loop (or under both top loops if you prefer).
• The hook should now be sitting in the chain stitch, with yarn below it.
3. Yarn over (YO)
• Bring the yarn over the hook from back to front.
• The yarn should sit in the “throat” of the hook.
4. Pull up a loop
• Turn the hook slightly down so it can slide through the stitch.
• Pull the yarn back through the chain stitch.
• You now have 2 loops on your hook.
5. Yarn over again
• Wrap the yarn over the hook from back to front one more time.
• You still have 2 loops on the hook.
6. Draw through both loops
• Turn the hook slightly downward and pull the yarn through both loops on the hook at the same time.
• You now have 1 loop on your hook again.
• This completes one single crochet.
7. Move to the next chain
• Look at your foundation chain: move to the next “V” stitch to the left.
• Insert your hook into that next chain.
8. Repeat across the row
For each remaining chain:
• Insert hook into next chain
• Yarn over
• Pull up a loop (2 loops on hook)
• Yarn over
• Pull through both loops (1 loop remains)
8. Keep going until you’ve worked into every chain across.
You now have a row of single crochet stitches.
Turning your work for the next row
9. Chain 1 to turn
• When you reach the end of the row, chain 1.
• This chain 1 is your turning chain for single crochet.
10. Turn your work
• Flip your work like a page in a book, so your hook is back at the right edge again (for right-handed crocheters; reverse for left-handed).
• Now you’ll be working into the tops of the single crochet stitches you just made, not into the starting chain.
11. Identify where to insert the hook
• Look at the top of the row: you’ll see “V” shapes along the top.
• Each “V” is the top of a single crochet stitch.
• Insert your hook under both strands of the V for a standard single crochet.
12. Work single crochet across the row
Into each “V” across:
• Insert hook under both loops of the stitch
• Yarn over
• Pull up a loop (2 loops on hook)
• Yarn over
• Pull through both loops
That’s a single crochet row.
4. The Half Double Crochet (hdc)
Think of the half double crochet as the perfect middle ground — taller than a single crochet but still easy to control.
Why beginners love it:
-
Works up faster than single crochet
-
Creates a soft, flexible fabric
-
Great for scarves, blankets, and hats
It’s one of the most versatile stitches in crochet.

Before you start
You should already have:
• A slip knot on your hook
• A foundation chain (any length your pattern says)
For this example, imagine you chained 11 and will work 9 half double crochets across.
Row 1: Half double crochet into the chain
1. Hold your work and find the third chain from the hook
• Don’t count the loop on your hook.
• Look at the “V” shapes of the chain.
• Count: first V = chain 1, next V = chain 2, next V = chain 3.
• You will work your first half double crochet into the 3rd chain from the hook.
2. Yarn over (YO) first
• Wrap the yarn over the hook from back to front once.
• You now have 2 loops on your hook (the original loop + the yarn over).
3. Insert the hook into the 3rd chain from the hook
• Push the hook through the center of that 3rd chain stitch.
• You can go under one loop or both loops of the chain (most patterns use the top loop or both loops; either works as long as you’re consistent).
4. Yarn over again
• With the hook now inside the chain, wrap the yarn over the hook from back to front again.
• You still technically have 2 loops on the hook, but you’re ready to pull through the chain.
5. Pull up a loop
• Turn the hook slightly down so it can glide through the chain.
• Pull the yarn back through the chain stitch.
• You will now have 3 loops on your hook.
6. Yarn over one more time
• Wrap the yarn over the hook from back to front again.
• You still see 3 loops on your hook, but now you’re ready to finish the stitch.
7. Pull through all three loops
• Turn the hook slightly down so it doesn’t snag.
• Pull the yarn through all 3 loops on the hook at once.
• You now have 1 loop left on the hook.
• That completes one half double crochet (hdc).
8. Move to the next chain
• Look at your foundation chain again.
• Move to the next “V” to the left (the next chain).
• Repeat the steps:
• Yarn over
• Insert into next chain
• Yarn over, pull up a loop (3 loops on hook)
• Yarn over, pull through all 3 loops
9. Work across the row
• Continue working one hdc into each chain until you reach the end of the row.
• You now have a row of half double crochet stitches.
Turning your work for the next row
10. Chain 2 to turn
• At the end of the row, chain 2.
• This is your turning chain for half double crochet.
11. Turn your work
• Flip your work like a page in a book, so the hook is back at the starting side again.
• Now you’ll be working into the tops of the hdc stitches you just made.
12. Find the top of each stitch
• Look at the top edge of your row: you’ll see a row of “V” shapes.
• Each V is the top of one half double crochet stitch.
13. Work hdc into each stitch across
For each stitch across the row:
• Yarn over
• Insert hook under both loops of the V (standard method)
• Yarn over, pull up a loop (3 loops on hook)
• Yarn over, pull through all 3 loops
That’s a full row of half double crochet.
5. The Double Crochet (dc)
The double crochet is taller, looser, and perfect for projects that need drape.
Best uses:
-
Blankets
-
Shawls
-
Lightweight scarves
-
Granny squares
Once you learn double crochet, you can tackle hundreds of beginner patterns.

Before you start
You should already have:
• A slip knot on your hook
• A foundation chain (any length your pattern says)
For this example, imagine you chained 13 and will work 11 double crochets across.
Row 1: Double crochet into the chain
1. Find the 4th chain from the hook
• Don’t count the loop on your hook.
• Look at the “V” shapes of the chain.
• Count: first V = chain 1, next = chain 2, next = chain 3, next = chain 4.
• You’ll work your first double crochet into the 4th chain from the hook.
2. Yarn over (YO) first
• Wrap the yarn over the hook from back to front once.
• You now have 2 loops on your hook (the loop + yarn over).
3. Insert the hook into the 4th chain
• Push the hook through the 4th chain from the hook.
• You can go under one loop or both loops of the chain (just be consistent).
4. Yarn over again
• With the hook inside the chain, wrap the yarn over the hook from back to front.
• You’re ready to pull through the chain.
5. Pull up a loop
• Turn the hook slightly down so it slides smoothly.
• Pull the yarn through the chain stitch.
• You now have 3 loops on your hook.
6. Yarn over, pull through 2 loops
• Wrap the yarn over the hook from back to front again.
• Pull the yarn through the first 2 loops on the hook.
• You now have 2 loops left on the hook.
7. Yarn over, pull through last 2 loops
• Yarn over again.
• Pull the yarn through the remaining 2 loops on the hook.
• You’re back to 1 loop on the hook.
• This completes one double crochet stitch.
8. Move to the next chain
• Look at your foundation chain and find the next “V” to the left.
• Repeat the steps:
• Yarn over
• Insert into next chain
• Yarn over, pull up a loop (3 loops on hook)
• Yarn over, pull through 2 loops (2 loops remain)
• Yarn over, pull through 2 loops (1 loop remains)
9. Work across the row
• Continue working one dc into each chain until you reach the end.
• You now have a row of double crochet stitches.
Turning your work for the next row
10. Chain 3 to turn
• At the end of the row, chain 3.
• This chain 3 is usually counted as your first double crochet of the next row (most patterns do, unless they say otherwise).
11. Turn your work
• Flip your work like a page in a book, so your hook is back at the start side again.
• Now you’ll be working into the tops of the double crochet stitches you just made.
12. Find the top of each stitch
• Look at the top edge of your row: you’ll see a line of “V” shapes.
• Each V is the top of one dc stitch.
• If your pattern counts the ch-3 as a stitch, you’ll usually skip the very first real stitch and work into the next one.
13. Work double crochet across the row
For each stitch across:
• Yarn over
• Insert hook under both loops of the “V”
• Yarn over, pull up a loop (3 loops on hook)
• Yarn over, pull through 2 loops (2 loops remain)
• Yarn over, pull through 2 loops (1 loop remains)
That’s a complete double crochet row.
Bonus: The Slip Stitch (sl st)
This tiny stitch is used for joining rounds, finishing edges, and adding decorative touches.
Why it matters:
-
Helps you connect pieces
-
Creates clean borders
-
Essential for amigurumi and granny squares
It’s simple but powerful.

Slip stitch into a chain or stitch (basic method)
1. Identify where you’ll insert the hook
• Look at your work (a chain or a row of stitches).
• Find the stitch or chain you want to slip stitch into (often the next chain or the top of a stitch).
2. Insert the hook
• Push the hook into the stitch:
• For a chain: through the center of the “V”.
• For a stitch: under both loops of the “V” at the top of the stitch.
• You now have your hook going through the fabric.
3. Yarn over (YO)
• Wrap the working yarn (the strand from the ball) over the hook from back to front.
• You now have two loops on/around the hook:
• The original loop
• The yarn you just wrapped
4. Pull through the stitch and the loop
• Gently pull the yarn back through the stitch you inserted into.
• Keep going and pull that same loop through the loop already on your hook.
• You are left with one loop on the hook.
5. That’s your slip stitch
• The slip stitch will look very flat and small.
• Your hook is now sitting in the next position, ready for whatever comes next.
Using a slip stitch to join a round
If you’re working in the round (like for hats or granny squares):
1. Find the first stitch of the round
• Usually the top of the starting chain or the first real stitch.
2. Insert hook into that stitch
• Under both loops of the “V”.
3. Yarn over
4. Pull through the stitch and the loop on the hook
• One motion: through the stitch, then through the loop on the hook.
5. Round is joined
• You’ll see a neat join with no added height.
Quick slip stitch reminder
• Insert hook into stitch
• Yarn over
• Pull through stitch AND loop on hook
Which Stitch Should You Learn First?
Start with this order:
-
Slip knot
-
Chain stitch
-
Single crochet
-
Half double crochet
-
Double crochet
-
Slip stitch
This progression builds your skills naturally and helps you understand how stitches relate to each other.
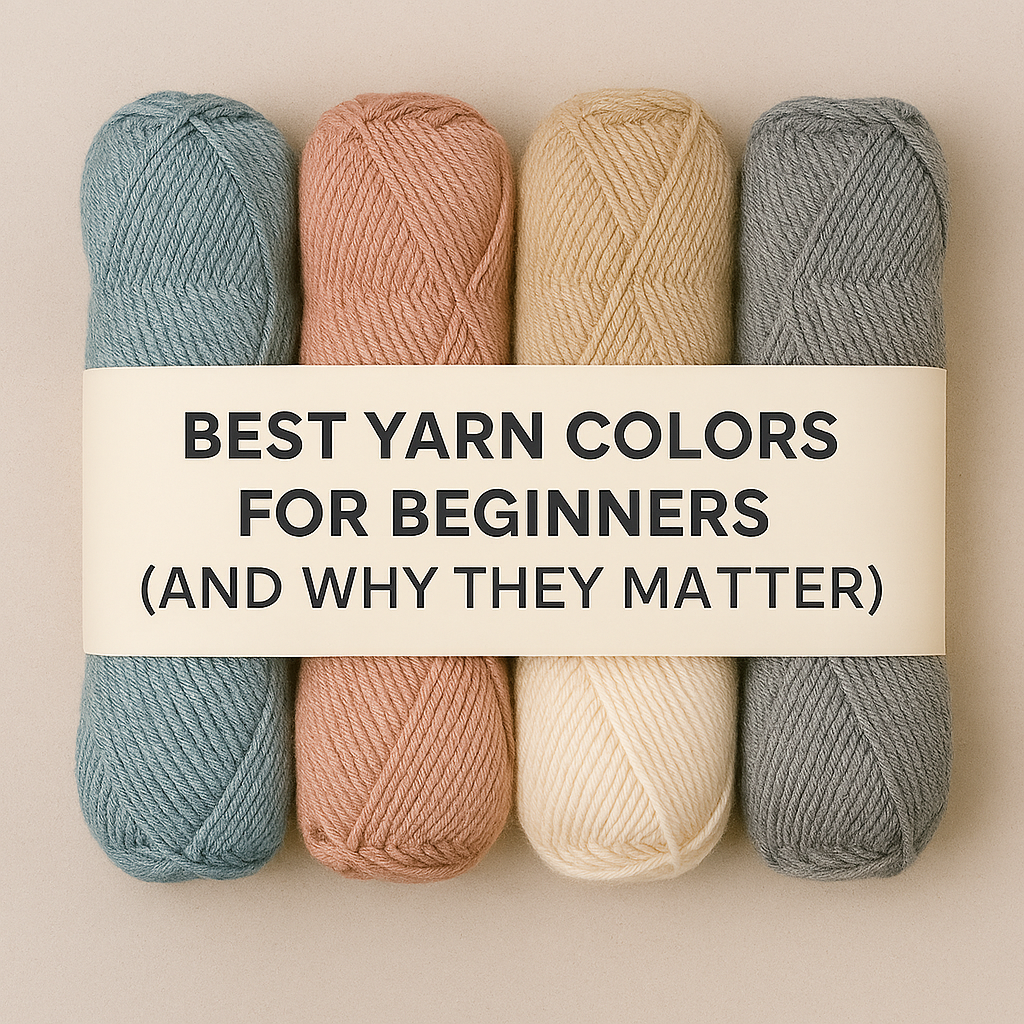
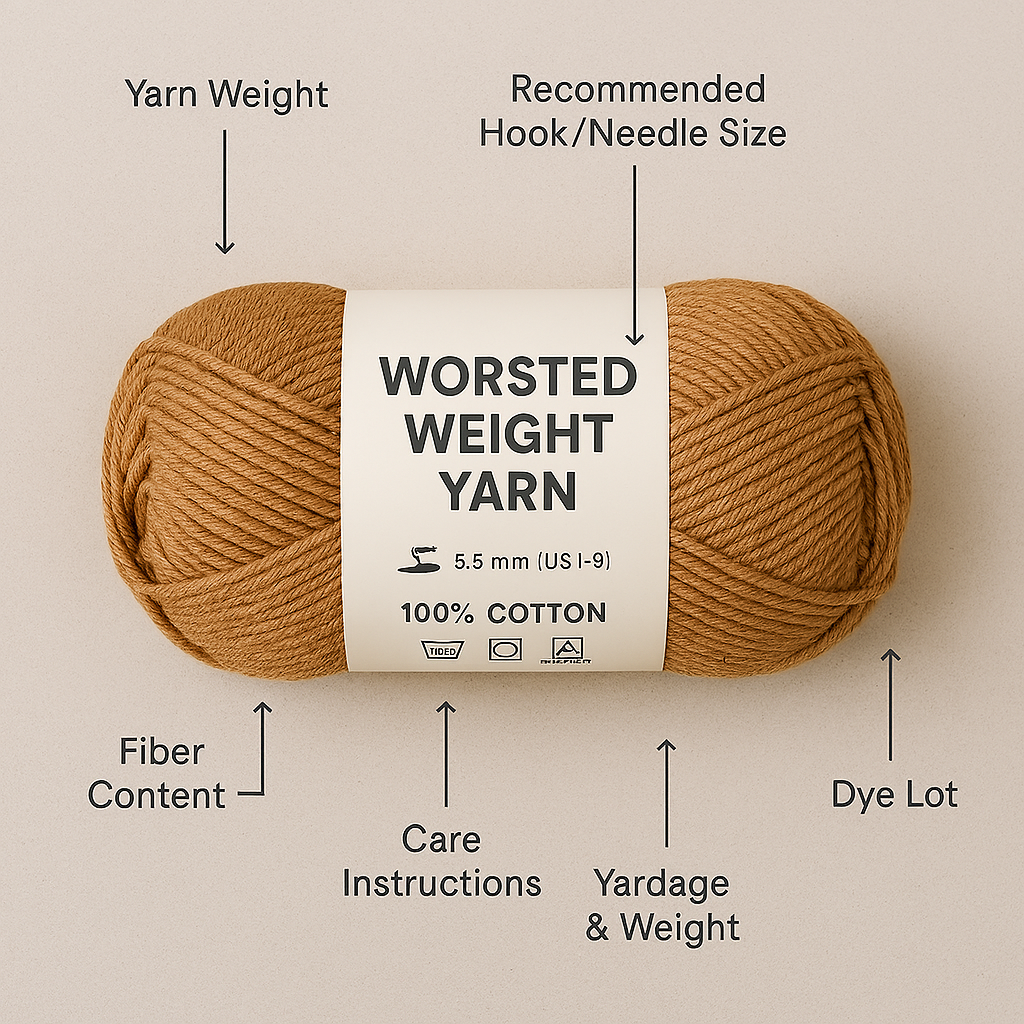
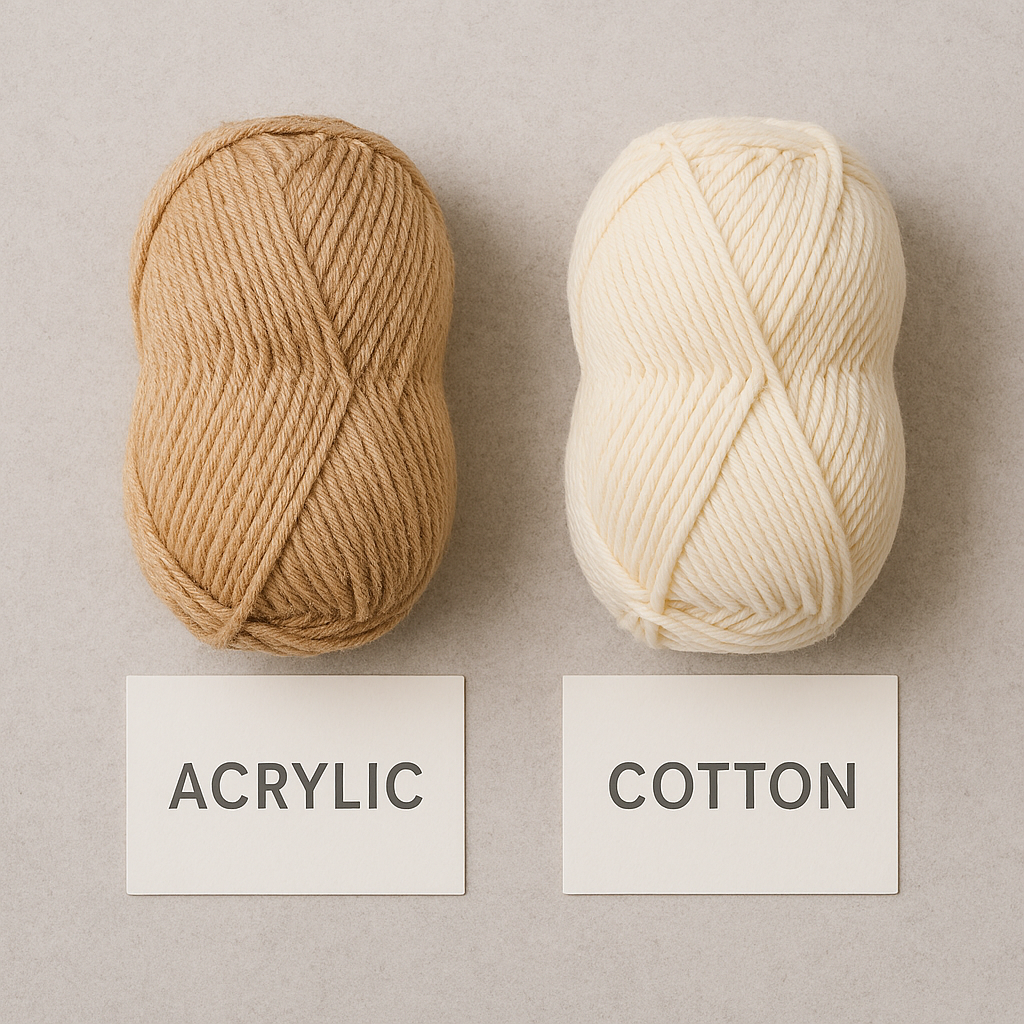
What Yarn Should Beginners Use for Practice?
To make learning easier, choose yarn that helps you see your stitches clearly.
Best yarn for beginners:
-
Worsted weight (#4)
-
Acrylic or cotton
-
Light or medium solid colors
At FoxKitCrafts.com, we offer beginner‑friendly yarns that glide smoothly on the hook and make practice enjoyable. Soft acrylics, smooth cottons, and coordinated color bundles are perfect for learning these stitches.
Final Thoughts
Crochet doesn’t have to be complicated. With just a few simple stitches, you can create beautiful, handmade pieces you’ll be proud of. Take your time, practice regularly, and enjoy the process — every crocheter starts right where you are.